What’s covered in this guide?
- Formatting your fiscal calendar ready for upload
- Uploading your fiscal calendar
- Using fiscal calendars in the Wordnerds platform
- Troubleshooting checklist
1. Formatting your fiscal calendar for upload
The first step to getting your fiscal calendar ready to use in the Wordnerds platform is formatting the data (don’t fret, it’s painless!).
We’ve prepared a handy template to work from - download the CSV file HERE.
The template shows you what information to include and how this should be formatted - simply add the data underneath the headers according to your fiscal calendar.
Here’s what you need…
- financial_id - this acts as a sequence number. Start from 1 then follow through to however many numbers of rows you have.
- name - your week number.
- start_date - the date each week (in the ‘name’ column) starts, formatted YYYY-MM-DD.
- end_date - the date each week ends, formatted YYYY-MM-DD.
- period_name - assign a period to each date.
- quarter_name - assign a quarter to each date.
💡 When adding your start and end dates, ensure you follow along in sequence. Don’t miss out or overlap any days, as this will cause the upload to fail.
Your end result should look something like this…

Once your whole fiscal calendar is formatted, download the file as a CSV.
Now you’re ready for the next step, the upload 🙂
2. Uploading your fiscal calendar
Start on the homepage, where all of your projects live. In the top right, select the calendar icon to navigate to Fiscal Calendars.

Click to add a Fiscal Calendar.

Next, name your calendar as something distinguishable and recognisable to all platform users - for example, ‘Fiscal year 2023/24’. This is the name that will show when you select the calendar in the date range filters on the platform.
Click Select a file to upload the CSV you formatted earlier (*you can also download our template from this page).
The message File accepted will show if everything is shipshape with your CSV.
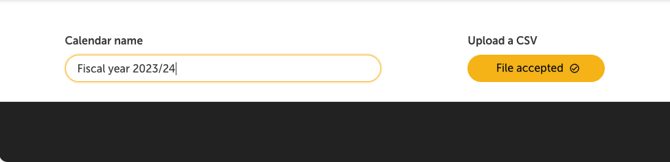
Click upload.
You’ll see a preview where you can double check all is in order. If there are any issues with your file, a pink banner will appear on this preview screen to highlight where you need to edit the CSV.
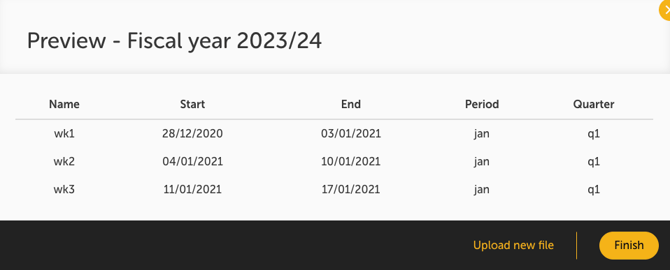
Click finish to add the calendar.
Once you upload your fiscal calendar from the homepage it will be available in all of your projects. Only one upload needed 🙂
Hooray! Time to jump into your projects to start filtering data using your fiscal calendar.
3. Using fiscal calendars in the Wordnerds platform
When exploring your data or creating visualisations in My Reports, once you’ve uploaded your fiscal calendar you can quickly filter by the timeframes you need.
To do so, head to the area of the platform you’re using to explore your data (whether that’s Trending, My Reports, etc), and start applying your filters.
In the Date Range filter section, select Custom.
Then select the Fiscal periods option and choose the range you want to look at.
💡 Note, the option to select Fiscal periods will only be available once you have uploaded your fiscal calendar using the steps above.

To get more specific, select custom fiscal periods. Here, you can choose the fiscal calendar you’d like to use, the period type (weeks, months, or quarters), and the range, so there’s no need to manually select the relevant dates - yay!
4. Troubleshooting checklist
Something not right? Check these points to resolve the issue.
- File format. The calendar must be uploaded as a CSV file to be accepted.
- Column headers and complete data. Ensure all of the required headers are populated on the CSV file you’re uploading (financial_id, name, start_date, end_date, period_name, quarter_name). Start with our handy template for ease!
- Dates in sequence. Check your start and end dates follow in sequence, with no dates missing or repeated.
- Date format. Dates in your CSV must be written as YYYY-MM-DD (e.g. 2024-01-22).
You can also watch our handy video guide on uploading fiscal calendars HERE.
Anything else? Drop a message in the help bubble at the bottom of your screen or give your Customer Success Manager a shout and they’ll be happy to help 😀